Block Window updates permanently can be crucial for users who require stability and consistency in their operating system. While Windows updates are designed to enhance security and performance, they can sometimes lead to unexpected issues. This guide will walk you through the steps to block Windows updates permanently, ensuring that your system remains as you configure it.
Step 1: Open the Windows Services Manager

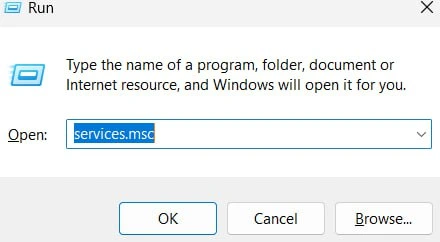
To begin blocking Windows updates, you need to access the Windows Services Manager. Press the Windows + R keys to open the Run dialog box. In the Run dialog box, type services.msc and press Enter. This will open the Services Manager, where you can manage various Windows services.
Step 2: Locate the Windows Update Service

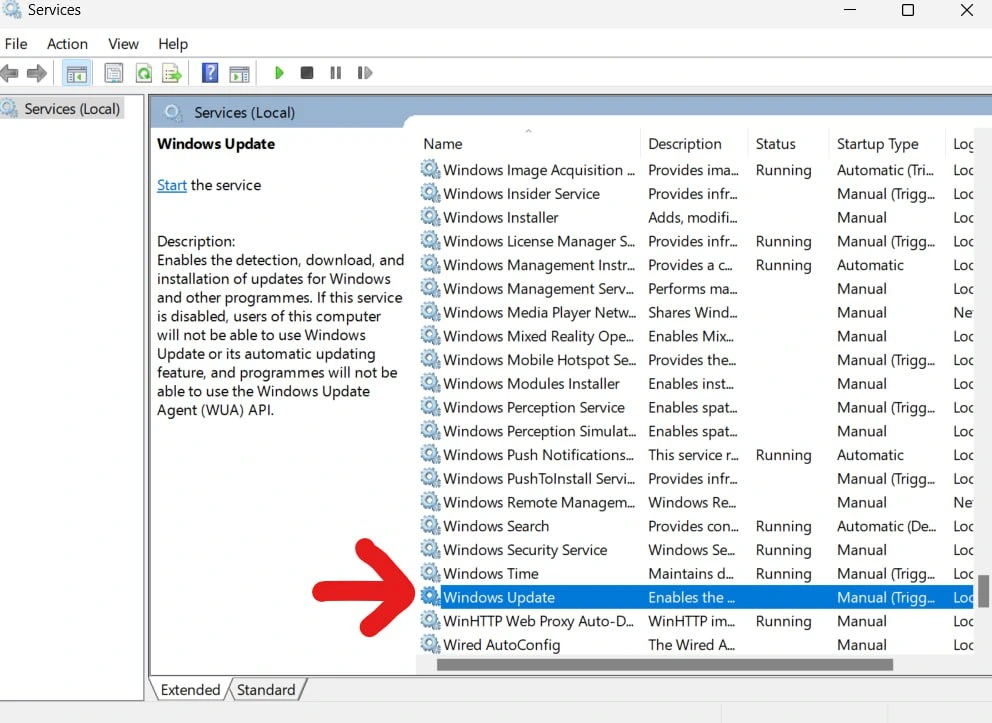
In the Services Manager, scroll down the list of services to find the Windows Update service. The services are listed alphabetically, so it should be near the bottom. Double-click on the Windows Update service to open its properties.
Step 3: Block Window updates services

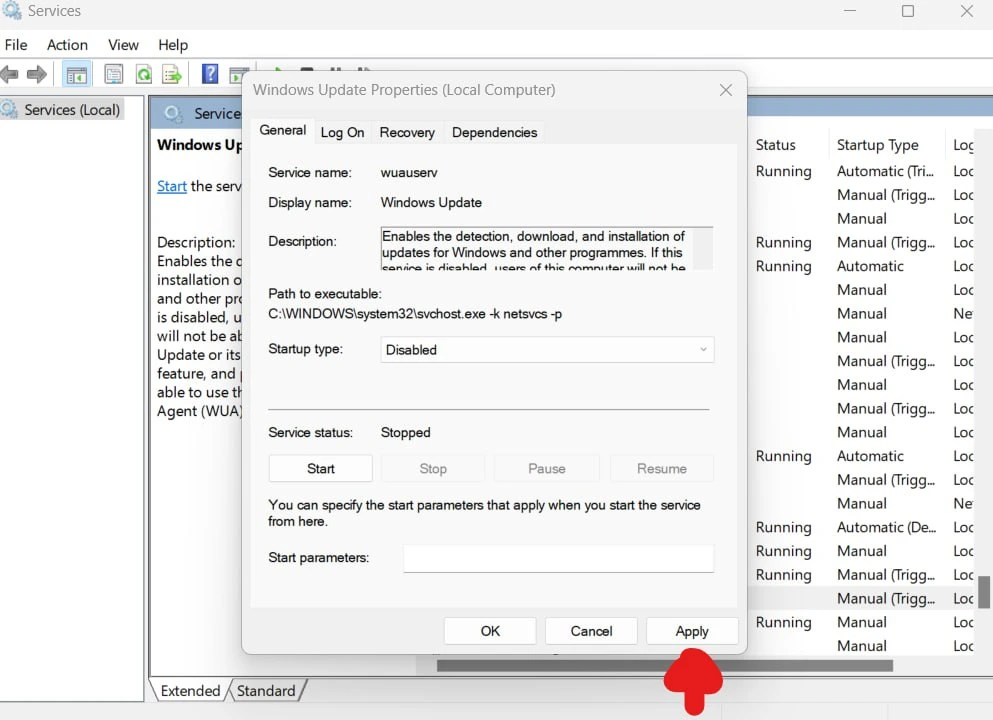
In the Windows Update Properties window, locate the Startup type dropdown menu. Click on the dropdown and select Disabled. This will prevent the Windows Update service from starting automatically. Next, click the Stop button to halt the service if it is currently running. Finally, click Apply and then OK to save your changes.
Step 4: Modify Group Policy Settings
To further ensure that Windows updates are blocked, you can modify Group Policy settings. Press the Windows + R keys to open the Run dialog box again. This time, type gpedit.msc and press Enter to open the Local Group Policy Editor. In the Local Group Policy Editor, navigate to Computer Configuration > Administrative Templates > Windows Components > Windows Update. Double-click on the policy titled Configure Automatic Updates.
Step 5: Configure Automatic Updates Policy
In the Configure Automatic Updates policy window, select the Disabled option. This will disable automatic updates. Click Apply and then OK to save your changes. This step ensures that even if the Windows Update service is enabled again, automatic updates will not be applied.
Step 6: Use a Third-Party Tool
For users who prefer a simpler solution, using a third-party tool can be effective. One recommended tool is StopUpdates10. This tool provides an easy-to-use interface for blocking Windows updates. Download and install StopUpdates10 from the official website. Once installed, open the application and click the Stop Windows Updates! button. This tool will automatically configure your system to block updates.
Step 7: Verify Update Block
To verify that Windows updates are blocked, you can check the Windows Update settings. Open the Settings app by pressing Windows + I. Navigate to Update & Security > Windows Update. You should see a message indicating that updates are paused or disabled. If you used StopUpdates10, the tool may also display a confirmation message within its interface.


