This comprehensive guide will walk you through each step to ensure you can remove any unwanted software from your Windows system.
Understanding Why You Might Need to Disinstall a Program
Disinstalling a program from your Windows computer can free up valuable space, improve system performance, and remove potentially harmful software. It’s important to regularly review and manage the programs installed on your computer to maintain optimal performance. Whether you’re looking to clear out old games, remove unused applications, or eliminate bloatware that came pre-installed, this guide will provide you with the necessary steps to do so effectively.
Step 1: Open the Control Panel

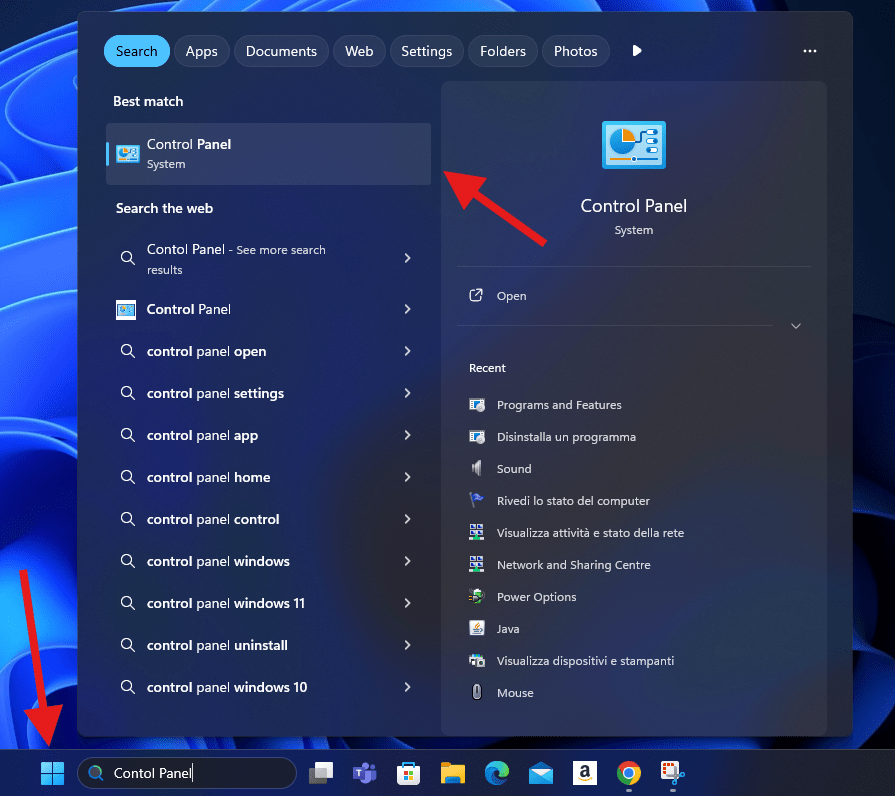
To begin the process of disinstalling a program, you need to access the Control Panel. Click on the Start menu located at the bottom-left corner of your screen, then type “Control Panel” into the search bar and press Enter. The Control Panel window will open, displaying various system settings and tools.
Step 2: Navigate to Programs and Features

Once inside the Control Panel, locate and click on the “Programs and Features” option. This section lists all the software currently installed on your computer. It provides an overview of the programs, including their names, publishers, installation dates, and sizes, allowing you to make informed decisions about which software to keep and which to remove.
Step 3: Select the Program You Wish to Disinstall
Scroll through the list of installed programs to find the one you want to remove. Click on the program’s name to select it. This highlights the program and activates the options available for managing it. Make sure you select the correct program, as this step is crucial to ensure you’re removing the intended software.
Step 4: Initiate the Uninstallation Process
After selecting the program, click on the “Uninstall” button located at the top of the Programs and Features window. This action will prompt the system to begin the uninstallation process. Depending on the software, you may see a confirmation dialog box asking you to verify your decision to remove the program. Confirm by clicking “Yes” or “Uninstall” to proceed.
Step 5: Follow the On-Screen Instructions
During the uninstallation process, you might encounter additional prompts or instructions from the program’s uninstaller. Follow these on-screen instructions carefully to complete the removal. Some programs may require you to restart your computer to finalize the uninstallation. If prompted, save any work and restart your system to ensure the program is fully removed.
Troubleshooting Common Issues
If you encounter issues while trying to disinstall a program, there are several troubleshooting steps you can take. For instance, if the program doesn’t appear in the Programs and Features list, you can use a third-party uninstaller tool to locate and remove it.
Using Third-Party Uninstaller Tools
In some cases, using a third-party uninstaller tool can simplify the process and ensure thorough removal of all program files and registry entries. These tools are designed to provide a more comprehensive uninstallation experience than the built-in Windows uninstaller. One popular option is Revo Uninstaller, which offers a free version with basic features and a paid version with advanced capabilities. Revo Uninstaller scans for leftover files and registry entries after the standard uninstallation process, ensuring a clean removal.
Revo Uninstaller: This tool is known for its thoroughness and ease of use. It provides a user-friendly interface and a range of features that make it simple to disinstall programs and clean up residual files. Revo Uninstaller’s “Hunter Mode” allows you to target specific programs for removal, even if they don’t appear in the Programs and Features list. Learn more about Revo Uninstaller.
Keeping Your System Clean and Organized
Regularly reviewing and managing the programs installed on your computer is essential for maintaining a clean and organized system. Consider setting a reminder to check your installed programs every few months and remove any that you no longer need. This proactive approach helps prevent unnecessary clutter and ensures your computer continues to run smoothly.
Conclusion
Disinstalling a program on Windows is a straightforward process that can greatly improve your computer’s performance and free up valuable space. By following the steps outlined in this guide, you can easily remove any unwanted software from your system. Whether you’re using the built-in Windows uninstaller or a third-party tool like Revo Uninstaller, regular program management is key to maintaining a clean and efficient computer.


